

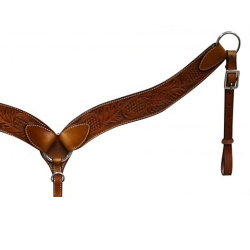
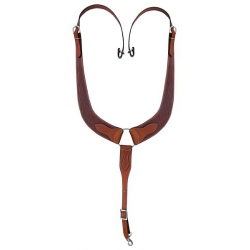
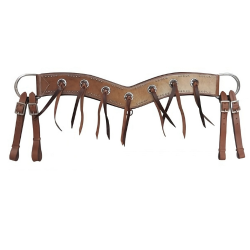
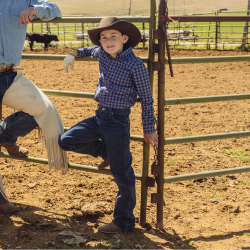

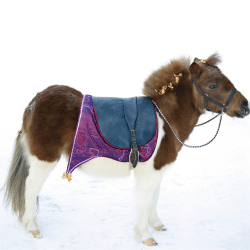


Welcome to our blog post on how to make a mohair breast collar! If you're a horse enthusiast or someone who loves crafting, then this post is for you. A breast collar is an essential piece of horse tack that helps secure the saddle and distribute the pressure evenly across the horse's chest. By using mohair, a luxurious and durable material, you can create a beautiful and functional breast collar that both you and your horse will love.
In this blog post, we will guide you through the process of making your own mohair breast collar. We'll start by understanding the basics of why a breast collar is important and why mohair is the ideal choice of material. Then, we'll help you gather all the necessary supplies and provide tips on where to purchase them.
Once you have all your materials, we'll walk you through the steps of preparing the mohair for weaving. This includes selecting your desired colors and pattern, measuring and cutting the mohair, and setting up your loom.
Next, we'll dive into the weaving process itself, explaining the basic techniques and ensuring that you maintain even tension throughout. We'll also cover the finishing touches and how to remove your creation from the loom.
Finally, we'll guide you through the process of assembling and finalizing your breast collar. This includes attaching the necessary hardware, adjusting it for the perfect fit, and providing tips on how to care for your mohair breast collar to ensure its longevity.
Whether you're a seasoned weaver or someone looking to explore a new craft, making your own mohair breast collar is a rewarding and fulfilling project. So, let's dive in and learn how to create a stunning and functional piece of horse tack that will truly make a statement.
Understanding the Basics: The Importance of a Breast Collar and the Use of Mohair
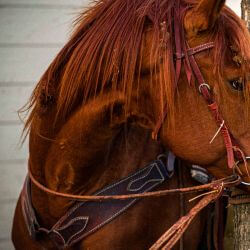
A breast collar is an essential piece of equipment used in horse riding and driving. It is designed to help secure the saddle in place and prevent it from sliding backward during movement. The breast collar plays a crucial role in distributing the pressure exerted by the rider or the carriage across the horse's chest, providing stability and comfort.
One of the key considerations when making a breast collar is the choice of material. Mohair, a type of fabric made from the hair of Angora goats, is a popular choice due to its unique properties. Mohair is known for its strength, durability, and elasticity, making it an excellent material for horse tack. Its natural fiber structure allows for breathability, moisture-wicking, and resistance to abrasion.
The use of mohair in a breast collar provides several benefits. Firstly, its elasticity allows for a snug fit around the horse's chest, ensuring that the collar stays in place without restricting movement. Secondly, mohair's moisture-wicking properties help to keep the horse comfortable by preventing excessive sweat buildup. Lastly, mohair's durability ensures that the breast collar can withstand the rigors of regular use.
By understanding the importance of a breast collar and the advantages of using mohair as the primary material, you can appreciate why making your own mohair breast collar is a worthwhile endeavor. Not only will you have a functional piece of horse tack, but you will also have the opportunity to create a personalized and stylish accessory for your horse. So, let's dive deeper into the process of making a mohair breast collar and explore the materials needed for this project.
Gathering Your Materials
Before you begin making your mohair breast collar, it's essential to gather all the necessary materials. Having everything prepared and within reach will make the crafting process more efficient and enjoyable. Here is a list of materials you'll need:
What is Mohair and Why Use it?
- Mohair: Mohair is a natural fiber made from the hair of Angora goats. It is known for its strength, durability, and elasticity, making it an ideal material for a breast collar. Mohair is available in various colors and patterns, allowing you to create a unique and personalized design.
List of Necessary Supplies
-
Mohair yarn: Choose high-quality mohair yarn in the colors and thickness you desire for your breast collar. Consider the size and breed of your horse when selecting the appropriate thickness.
-
Loom: A loom is a weaving tool used to hold the warp threads in place while weaving. There are various types of looms available, including rigid heddle looms or floor looms. Select a loom that suits your weaving preferences and project requirements.
-
Loom accessories: Depending on your loom type, you may need additional accessories such as heddles, shuttles, and warp sticks. These tools assist in the weaving process and ensure proper tension and alignment.
-
Weaving tools: Gather essential weaving tools such as a weaving shuttle, shed stick, and tapestry needle. These tools will aid in the weaving process and help achieve the desired pattern and texture.
-
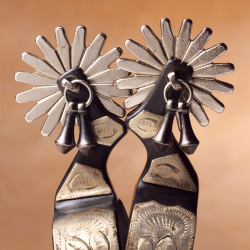
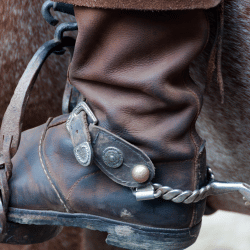
Hardware: You will need hardware to attach the breast collar to the saddle. This may include D-rings, buckles, snaps, and other fasteners. Consider the size and style that best suits your design.
-
Measuring tape: Accurate measurements are crucial for a well-fitting breast collar. Have a measuring tape or ruler on hand to measure your horse's chest and determine the appropriate length for the collar.
-
Scissors: Sharp scissors will be necessary for cutting the mohair yarn to the desired lengths.
-
Other tools: Depending on your preferred weaving technique, you may also need tools such as a warp separator, warp threader, or comb for maintaining tension and even spacing.
Where to Purchase Materials
-
Local craft stores: Visit your local craft or weaving supply stores to find mohair yarn, looms, and weaving tools. They may also have hardware and other accessories required for making a breast collar.
-
Online retailers: Explore online platforms specializing in weaving supplies, yarn, and equestrian equipment. Websites such as Etsy, Amazon, or dedicated weaving supply websites offer a wide range of materials and tools.
By gathering all the necessary materials before starting your mohair breast collar project, you'll be well-prepared to dive into the weaving process. In the next section, we will discuss the steps involved in preparing the mohair for weaving.
Preparing the Mohair for Weaving
Once you have gathered all the necessary materials, it's time to prepare the mohair for weaving. This section will guide you through the steps involved in preparing the mohair yarn, including choosing your colors and pattern, measuring and cutting the yarn, and setting up your loom.
Choosing Your Colors and Pattern
-
Color selection: Decide on the color scheme for your mohair breast collar. Consider your horse's coat color and any personal preferences you may have. Mohair yarn is available in a wide range of colors, so choose colors that complement your horse and reflect your style.
-
Pattern selection: Determine the pattern you want to weave into your breast collar. This can be as simple as a plain weave or as intricate as a complex design. Look for weaving patterns and inspirations online, in weaving books, or through your own creative ideas.
Measuring and Cutting the Mohair
-
Measure your horse's chest: Use a measuring tape or ruler to accurately measure your horse's chest. This measurement will determine the length of your breast collar. Ensure that the collar fits comfortably without being too tight or too loose.
-
Calculate the required length: Take your horse's chest measurement and add a few extra inches for adjustability and fastening hardware. This will give you the total length of mohair yarn needed for the collar.
-
Cut the mohair yarn: Using sharp scissors, cut the mohair yarn into the required lengths based on your calculated measurement. Make sure the cuts are clean and even to ensure a neat and professional-looking collar.
Setting Up Your Loom
-
Choose the appropriate loom: Select a loom suitable for the size of your breast collar project. Ensure that it can accommodate the desired width and length of the collar. Follow the manufacturer's instructions for setting up the loom.
-
Prepare the warp threads: Warp threads are the vertical threads that run lengthwise on the loom. Measure and cut the required number of warp threads, considering the desired width of the collar and the spacing between threads. Attach one end of the warp threads to the loom, ensuring even tension.
-
Thread the heddles (if applicable): If your loom has heddles, thread the warp threads through them. Heddles help create sheds, which are the openings for passing the weft yarn through during weaving. Follow the loom manufacturer's instructions for threading the heddles.
-
Wind the warp onto the loom: Wind the warp threads onto the loom, maintaining even tension and avoiding tangling or overlapping. Use warp sticks or lease sticks to ensure proper spacing and alignment.
By following these steps to prepare the mohair for weaving, you'll be ready to start weaving your mohair breast collar. In the next section, we will delve into the weaving process itself, guiding you through the essential techniques and ensuring even tension for a successful project.
Weaving Your Mohair Breast Collar
Now that you have prepared the mohair and set up your loom, it's time to dive into the weaving process itself. This section will guide you through the steps of weaving your mohair breast collar, ensuring even tension and achieving the desired pattern.
The Basic Weaving Process
-
Start with a header: Begin by weaving a few rows of scrap yarn or a contrasting color at the beginning of your warp threads. This helps create a stable base and allows for easier finishing later on.
-
Choose your weaving technique: Depending on your desired pattern and skill level, you can choose from various weaving techniques such as plain weave, twill, or more complex designs like herringbone or lace patterns. Follow your chosen pattern's instructions for the specific weaving technique.
-
Pass the weft yarn through the shed: Create a shed by raising the appropriate warp threads using your loom's shedding device or by manually manipulating the threads. Pass the weft yarn over and under the raised (or lowered) warp threads, alternating with each row.
-
Beat the weft: After each row of weft is passed through, use a weaving comb or beater to firmly press the weft yarn against the woven fabric. This helps ensure even tension and a tight, solid fabric.
-
Repeat the process: Continue to create sheds and pass the weft yarn through until you reach the desired length of your breast collar. Be mindful of maintaining consistent tension and beating the weft after each row.
Ensuring Even Tension
-
Check for consistent tension: Regularly check the tension of your warp threads to ensure they are evenly spaced and not too loose or too tight. Adjust the tension as needed throughout the weaving process.
-
Use a weaving comb or beater: As mentioned earlier, use a weaving comb or beater to firmly press the weft yarn against the fabric. This helps maintain even tension and prevents gaps or loose areas in the weave.
Finishing and Removing from the Loom
-
Finish the edges: Once you have reached the desired length of your breast collar, weave a few rows of scrap yarn or a contrasting color at the end to create a stable edge. This will make it easier to remove the collar from the loom and provide a finished look.
-
Cut the warp threads: Carefully cut the warp threads, leaving enough length for finishing and attaching hardware. Secure the cut ends to prevent unraveling.
-
Remove the breast collar from the loom: Take the breast collar off the loom, gently easing it out from the warp threads. Be cautious not to pull or distort the woven fabric.
With these steps, you have successfully woven your mohair breast collar! In the next section, we will guide you through the process of assembling and finalizing your breast collar, including attaching the necessary hardware and adjusting it for the perfect fit.
Assembling and Finalizing Your Breast Collar
Now that you have completed the weaving process, it's time to assemble and finalize your mohair breast collar. This section will guide you through the steps of attaching the necessary hardware, adjusting the collar for a perfect fit, and providing tips on how to care for your creation.
Attaching the Hardware
-
Determine the placement: Decide where you want to attach the hardware on your breast collar. This includes D-rings, buckles, snaps, or any other fasteners you have chosen. Consider the size and style of hardware that best suits your design.
-
Sew or secure the hardware: Using a sturdy thread or mohair yarn, sew or securely attach the hardware to the appropriate spots on the breast collar. Ensure that the hardware is strongly fastened to withstand regular use.
Adjusting for Fit
-
Measure and adjust: Place the breast collar on your horse's chest and adjust it for a proper fit. Ensure that it is snug but not too tight, allowing for comfortable movement and proper breathing.
-
Fasten the collar: Once you have adjusted the collar to the desired fit, fasten the hardware to secure it in place. Double-check that the collar is securely fastened and properly aligned.
Caring for Your Mohair Breast Collar
-
Regular cleaning: Mohair is naturally resistant to dirt and odors, but regular cleaning is still necessary to maintain its appearance and functionality. Follow the manufacturer's instructions for cleaning the mohair yarn. It is often recommended to hand wash or spot clean with mild detergent and cold water.
-
Drying and storage: After cleaning, allow the breast collar to air dry completely before storing it. Avoid direct sunlight or heat sources that may damage the mohair fibers. Store the collar in a cool, dry place to prevent moisture buildup and potential damage.
-
Inspect for wear and tear: Periodically check the breast collar for any signs of wear and tear, such as loose threads or damaged hardware. Repair or replace any damaged components to ensure the collar remains safe and functional.
By following these steps to assemble, adjust, and care for your mohair breast collar, you can enjoy its functionality and beauty for years to come. Congratulations on creating a personalized and stylish accessory for your horse!
In the final section of this blog post, we will provide a summary of the key points covered and offer some additional tips and insights for making a mohair breast collar.
