


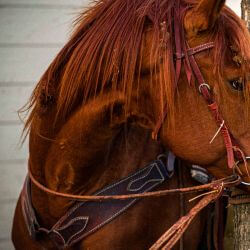


A breast collar is an essential piece of equipment for riders who want to ensure the safety and comfort of their horse while riding. It not only helps to prevent the saddle from slipping backward but also provides stability and support to the horse's chest. However, attaching a breast collar to a saddle might seem like a daunting task for beginners. In this blog post, we will guide you through the step-by-step process of attaching a breast collar to a saddle, ensuring a secure fit and optimal functionality. We will also discuss common mistakes to avoid and provide tips for maintaining and cleaning your breast collar. So, if you're ready to learn how to properly attach a breast collar to a saddle, let's dive in!
Introduction: Understanding the Importance of a Breast Collar
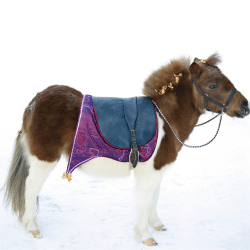
A breast collar is an integral part of the horse's tack that plays a crucial role in ensuring the safety and stability of both the rider and the horse. Understanding the importance of a breast collar is essential for every equestrian.
-
Enhancing Stability: One of the primary functions of a breast collar is to provide stability to the saddle by preventing it from sliding backward. When riding on rough terrains or engaging in activities such as jumping or trail riding, the breast collar helps to keep the saddle in place and maintain a balanced position.
-
Distributing Pressure: A properly fitted breast collar helps distribute the pressure exerted by the rider's weight and the saddle across the horse's chest. This helps to alleviate the strain on the horse's shoulders and prevents discomfort or injuries during extended riding sessions.
-
Preventing Saddle Slippage: In situations where the horse's conformation or movement causes the saddle to shift forward, a breast collar can help prevent the saddle from slipping over the horse's shoulders. This is particularly important when riding steep slopes or engaging in activities that involve sudden stops or changes in speed.
-
Supporting the Horse's Breathing: A breast collar can assist in keeping the horse's airways clear and unrestricted. By preventing the saddle from pressing against the horse's windpipe or restricting chest movement, the breast collar ensures that the horse can breathe comfortably and perform optimally.
-
Adding Decorative Appeal: Apart from its functional benefits, a breast collar can also enhance the overall appearance of the horse and rider. With a wide variety of designs, colors, and materials available, breast collars offer an opportunity for riders to express their personal style and add a touch of elegance to their tack.
Understanding the importance of a breast collar will help you appreciate its role in maintaining the safety and well-being of both you and your horse. In the following sections, we will delve into the details of attaching a breast collar to a saddle, ensuring a secure fit, and maximizing its effectiveness.
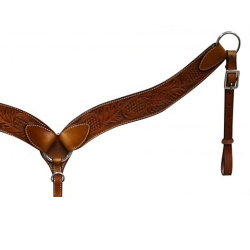
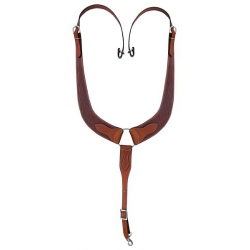
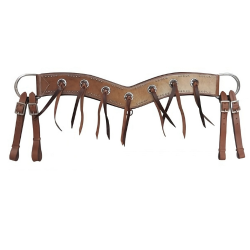
Parts of a Breast Collar and Saddle
To properly attach a breast collar to a saddle, it's essential to familiarize yourself with the various parts of both the breast collar and the saddle. Understanding these components will help you correctly identify and connect them during the attachment process.
Identifying Parts of a Breast Collar
-
Neck Strap: The neck strap, also known as the wither strap, is the part of the breast collar that goes over the horse's withers. It helps to secure the breast collar in place and prevent it from sliding backward.
-
Shoulder Straps: These straps are attached to the neck strap and run along the sides of the horse's neck, passing over the shoulders. They provide support and stability to the breast collar.
-
Center Strap: The center strap is the main part of the breast collar that runs underneath the horse's chest. It connects the shoulder straps and is responsible for distributing pressure evenly.
-
Billets or Dee Rings: The billets or dee rings are the attachment points on the breast collar where the saddle's tugs or girth straps are connected. They allow for secure fastening and proper alignment between the breast collar and the saddle.
Identifying Parts of a Saddle
-
Pommel: The pommel is the front part of the saddle that rises above the withers. It provides stability and support to the rider.
-
Gullet: The gullet is the channel or space between the pommel and the cantle. It allows clearance for the horse's spine and provides comfort.
-
Stirrup Bars: These are metal loops or attachments on the underside of the saddle near the pommel. They serve as anchor points for the stirrup leathers.
-
Saddle Flaps: The saddle flaps are the large, flat panels on each side of the saddle. They provide protection and support to the rider's legs and help distribute the rider's weight evenly.
-
Billets or Girth Straps: The billets or girth straps are the adjustable straps attached to the saddle's underside. They are used to secure the saddle to the horse's girth or cinch.
Understanding the different parts of a breast collar and a saddle will enable you to correctly identify and connect the corresponding components when attaching the breast collar to the saddle. In the next section, we will discuss the step-by-step process of attaching a breast collar to a saddle, ensuring a secure and comfortable fit.
Steps to Attach a Breast Collar to a Saddle
Attaching a breast collar to a saddle requires careful attention to detail and proper adjustment to ensure a secure fit. Follow these step-by-step instructions to attach a breast collar to your saddle effectively:
Step 1: Preparing Your Horse and Equipment
-
Groom your horse: Before attaching the breast collar, groom your horse thoroughly to remove any dirt, debris, or sweat from their chest area. This will ensure a clean and comfortable fit.
-
Check the breast collar and saddle: Inspect both the breast collar and saddle for any signs of damage or wear. Ensure that all the buckles, straps, and attachments are in good condition and functioning properly.
-
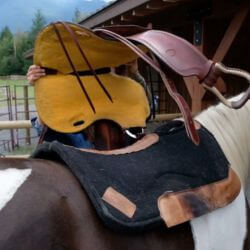
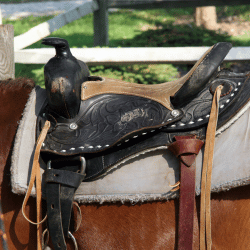
Adjust the saddle: Place the saddle on your horse's back and adjust it to the proper position. Ensure that the saddle is centered and sits evenly on the horse's back before proceeding.
Step 2: Attaching the Breast Collar to the Saddle
-
Identify the billets or dee rings: Locate the billets or dee rings on the breast collar. These are the attachment points that will connect to the saddle.
-
Attach the breast collar to the saddle: Hold the breast collar with the center strap facing down and the shoulder straps on either side. Pass the center strap through the dee rings or billets on the saddle, from the bottom to the top. Ensure that the breast collar is centered and hanging straight.
-
Secure the breast collar straps: Once the breast collar is threaded through the dee rings or billets, adjust the shoulder straps so that they sit comfortably on the horse's shoulders. Fasten the buckles or snaps on the straps to secure them in place. Ensure that the breast collar is snug but not too tight, allowing room for the horse's movement and breathing.
Step 3: Adjusting for Proper Fit
-
Check the fit: Stand on the horse's left side and observe the breast collar's position. It should sit approximately two inches above the point of the horse's shoulder, allowing for freedom of movement. Adjust the shoulder straps if necessary to achieve the proper fit.
-
Ensure clearance: Check that there is enough clearance between the breast collar and the horse's windpipe. It should not restrict the horse's breathing or cause discomfort.
-
Test for movement: Once the breast collar is attached and adjusted, ask your horse to move around and perform some light exercises. Observe how the breast collar sits and ensure that it remains in place without causing any rubbing or discomfort. Make any necessary adjustments as needed.
Attaching a breast collar to a saddle is a crucial step to ensure the safety and comfort of both you and your horse during rides. By following these steps and adjusting for a proper fit, you can confidently attach a breast collar and enjoy your riding experience. In the next section, we will discuss common mistakes to avoid when attaching a breast collar to a saddle.
Common Mistakes and How to Avoid Them
When attaching a breast collar to a saddle, it's important to be aware of common mistakes that can compromise the effectiveness and safety of the equipment. By understanding these pitfalls, you can take the necessary precautions to avoid them. Here are some common mistakes to watch out for and how to avoid them:
Incorrect Placement of the Breast Collar
-
Placing the breast collar too high: One common mistake is attaching the breast collar too high on the horse's chest. This can restrict the horse's shoulder movement and cause discomfort. Ensure that the breast collar sits approximately two inches above the point of the shoulder for proper placement.
-
Placing the breast collar too low: Conversely, attaching the breast collar too low can render it ineffective in preventing saddle slippage. Make sure the breast collar is positioned high enough to provide support and stability to the saddle.
Incorrect Adjustment of Straps
-
Over-tightening the breast collar: Pulling the straps too tight can restrict the horse's movement and cause discomfort. The breast collar should be snug enough to prevent slipping but still allow freedom of movement. Check that you can comfortably fit two fingers between the breast collar and the horse's chest.
-
Under-tightening the breast collar: On the other hand, leaving the breast collar too loose can render it ineffective in preventing saddle movement. Ensure that the breast collar is adjusted properly to provide adequate support and stability.
Ignoring Regular Maintenance
-
Neglecting to inspect for wear and tear: Over time, the breast collar may experience wear and tear from regular use. It's important to inspect the breast collar regularly for any signs of damage, such as frayed straps or weakened buckles. Replace or repair any worn-out parts to maintain the integrity of the breast collar.
-
Failing to clean and condition the breast collar: Dust, dirt, and sweat can accumulate on the breast collar, leading to discomfort and potential skin issues for the horse. Regularly clean the breast collar with a damp cloth and mild soap, then apply a leather conditioner to keep it supple and in good condition.
By avoiding these common mistakes and ensuring correct placement, adjustment, and maintenance of the breast collar, you can maximize its effectiveness and ensure the comfort and safety of both you and your horse. In the next section, we will discuss how to properly maintain and clean your breast collar.
Maintaining and Cleaning Your Breast Collar
Proper maintenance and cleaning of your breast collar are essential to ensure its longevity, functionality, and the comfort of your horse. Here are some steps to help you effectively maintain and clean your breast collar:
Regular Inspection for Wear and Tear
-
Check for signs of wear: Routinely inspect your breast collar for any signs of wear and tear, such as frayed straps, loose stitching, or damaged buckles. Address any issues promptly to prevent further damage and ensure the safety of both you and your horse.
-
Evaluate the condition of the leather: Examine the leather of your breast collar for dryness, cracking, or stiffness. If necessary, apply a leather conditioner to keep the leather supple and prevent it from becoming brittle.
-
Verify the functionality of buckles and snaps: Test the buckles and snaps on your breast collar to ensure they are in good working condition. Replace any broken or damaged hardware as needed.
Cleaning and Conditioning the Breast Collar
-
Remove dirt and debris: Before cleaning, use a soft brush or cloth to remove any loose dirt, dust, or debris from the surface of the breast collar. Pay extra attention to areas where sweat and grime tend to accumulate.
-
Clean with mild soap and water: Fill a bucket with warm water and add a small amount of mild soap. Dip a clean cloth or sponge into the soapy water and gently scrub the entire surface of the breast collar. Pay attention to any stubborn stains or spots.
-
Rinse thoroughly: After cleaning, rinse the breast collar with clean water to remove any soap residue. Ensure that all soap is thoroughly rinsed off to prevent irritation or discomfort for your horse.
-
Dry properly: Allow the breast collar to air dry in a well-ventilated area away from direct sunlight or heat sources. Avoid using artificial heat or hair dryers, as this can cause the leather to dry out or become damaged.
-
Apply leather conditioner: Once the breast collar is completely dry, apply a leather conditioner to keep the leather soft and supple. Follow the manufacturer's instructions for the specific conditioner you are using.
Storing Your Breast Collar Properly
-
Store in a cool, dry place: When not in use, store your breast collar in a cool and dry place to prevent mold, mildew, or moisture damage. Avoid storing it in damp areas or near direct sunlight, as this can cause the leather to fade or deteriorate.
-
Use a breathable storage bag: Consider using a breathable storage bag or cover to protect your breast collar from dust and dirt while allowing air circulation to prevent moisture buildup.
By regularly maintaining and cleaning your breast collar, you can extend its lifespan and ensure its optimal functionality. Proper care and attention to detail will help keep your horse comfortable and safe during rides. In the next section, we will wrap up the blog post with a summary and concluding thoughts.
