Are you looking for a durable and budget-friendly option for a breast collar for your horse or mule? Look no further than a mule tape breast collar! Made from strong and versatile mule tape, this DIY project is a great alternative to traditional leather breast collars. In this blog post, we will guide you through the process of making your own mule tape breast collar, from understanding the basics to adding the finishing touches. With a few simple steps, you'll have a customized breast collar that not only looks great but also provides comfort and security for your equine companion. So let's dive in and learn how to make a mule tape breast collar that is sure to impress!
Understanding the Basics: What is a Mule Tape Breast Collar
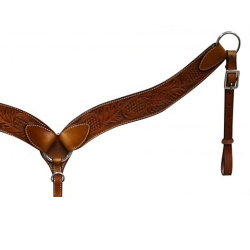
A mule tape breast collar is a type of harness designed to secure the saddle in place and distribute the weight of the load evenly across a horse or mule's chest. It is an essential piece of equipment for riders who engage in activities such as trail riding, ranch work, or hauling heavy loads.
The main component of a mule tape breast collar is the mule tape itself. Mule tape is a strong and durable material made from woven polyester fibers. It is commonly used in the electrical industry for pulling cables and wires due to its high tensile strength. The same characteristics that make mule tape suitable for heavy-duty tasks also make it an excellent choice for crafting a breast collar.
Mule tape breast collars offer several advantages over traditional leather breast collars. Firstly, they are more affordable, making them a budget-friendly option for horse owners. Additionally, mule tape is lightweight and easy to handle, reducing the strain on your horse or mule. It is also resistant to moisture, rot, and mildew, making it suitable for use in various weather conditions.
Furthermore, mule tape breast collars can be customized to fit your horse or mule perfectly. With a few measurements and some basic sewing skills, you can create a breast collar that provides optimal comfort and support. Whether you are a DIY enthusiast or simply looking for a cost-effective alternative, making your own mule tape breast collar is a rewarding and practical project.
In the following sections, we will guide you through each step of the process, from gathering the necessary materials to constructing and adjusting the breast collar. So let's get started on this exciting journey of creating a mule tape breast collar that is both functional and stylish!
Gathering Your Materials
Before you begin making your mule tape breast collar, it's important to gather all the necessary materials. Here's a list of items you'll need for this project:
1. Mule Tape
Mule tape is the primary material for creating the breast collar. It is a strong, woven polyester tape that is commonly used for pulling cables and wires. You can purchase mule tape from various online retailers or local hardware stores. Make sure to choose a width and length that is suitable for your horse or mule.
2. Sewing Machine or Needle and Thread
To assemble the breast collar, you'll need a sewing machine or a needle and thread. A heavy-duty sewing machine is recommended for working with mule tape. If you don't have access to a sewing machine, you can hand sew the breast collar using a strong, durable thread such as nylon or polyester.
3. Scissors
You'll need a pair of sharp scissors to cut the mule tape to the desired length. Make sure the scissors are capable of cutting through thick materials.
4. Measuring Tape
Accurate measurements are crucial for creating a properly fitting breast collar. Use a measuring tape to measure your horse or mule's chest and shoulders. This will ensure that the breast collar is the right size and provides a comfortable fit.
5. Buckles and Hardware
To secure the breast collar around your horse or mule, you'll need buckles and hardware. Choose durable and rust-resistant buckles that are suitable for the width of your mule tape. Additionally, you may need D-rings, snaps, or other hardware for adjusting and attaching the breast collar.
6. Optional: Decorative Elements
If you want to add a personal touch or enhance the appearance of your breast collar, consider adding decorative elements such as conchos, beads, or leather accents. These can be found at craft stores or online equestrian supply shops.
Once you have gathered all the necessary materials, you'll be ready to move on to the next steps of creating your mule tape breast collar.
Preparing Your Mule Tape
Before you can start constructing your mule tape breast collar, it's important to properly prepare the mule tape. This involves measuring and cutting the tape to the appropriate length and taking steps to prevent fraying. Follow these steps to ensure your mule tape is ready for assembly:
1. Measuring and Cutting Your Mule Tape
Start by measuring the appropriate length for your breast collar. Use a soft measuring tape to measure from the center of the chest, under the horse or mule's neck, to the center of the chest on the other side. This will give you the length of the chest strap.
Next, measure the length of the shoulder straps by measuring from the center of the chest, over the shoulder, and down to the attachment point on the saddle. Keep in mind that the shoulder straps should be long enough to allow for movement and comfort.
Using the measured lengths, cut the mule tape into the required pieces using sharp scissors. Be sure to cut straight lines to ensure neat and even edges.
2. Tips for Preventing Fraying
Mule tape has a tendency to fray, so it's important to take precautions to prevent this. Here are a few tips to help minimize fraying:
- Apply a thin layer of clear nail polish or fabric glue along the cut edges of the mule tape. This will help seal the fibers and prevent fraying.
- Use a heat source, such as a lighter or a candle flame, to carefully melt the cut edges of the mule tape. Hold the tape slightly above the flame, moving it back and forth until the edges start to melt and fuse together. Be cautious not to hold it too close to the flame to avoid scorching or discoloration.
- Alternatively, you can use a hot knife to cut the mule tape. The heat from the knife will help seal the edges as you cut, preventing fraying.
By measuring and cutting your mule tape accurately and taking steps to prevent fraying, you'll be ready to move on to the next steps of constructing your mule tape breast collar.
Constructing the Breast Collar
Now that you have prepared your mule tape, it's time to start constructing your breast collar. This section will guide you through the process of creating the chest strap, forming the shoulder straps, and assembling the collar.
1. Creating the Chest Strap
Start by taking one of the longer pieces of mule tape that you cut for the chest strap. Fold it in half lengthwise, ensuring that the edges align.
Using your sewing machine or needle and thread, sew along the open long edge of the folded mule tape. This will create a secure seam and prevent the tape from unraveling.
Next, attach the buckles to the ends of the chest strap. Fold each end of the mule tape over the bar of the buckle and sew it securely in place. This will create a loop that can be adjusted to fit your horse or mule.
2. Forming the Shoulder Straps
Take the remaining pieces of mule tape that you cut for the shoulder straps. Fold each piece in half lengthwise, just like you did with the chest strap.
Sew along the open long edge of each folded mule tape to create a seam.
At one end of each shoulder strap, create a loop by folding the mule tape over and sewing it securely. This loop will be used to attach the shoulder straps to the chest strap later on.
3. Assembling the Collar
Now it's time to assemble the breast collar. Start by attaching the shoulder straps to the chest strap. Thread the looped ends of the shoulder straps through the buckles on the chest strap, ensuring that they are facing the correct direction.
Next, adjust the length of the shoulder straps to fit your horse or mule comfortably. This can be done by sliding the buckles on the chest strap to tighten or loosen the straps.
Once you have achieved the desired length, fold the ends of the shoulder straps over the buckles and sew them securely. This will ensure that the shoulder straps are securely attached to the chest strap.
Congratulations! You have successfully constructed your mule tape breast collar. The next section will cover finishing touches and adjustments to ensure the collar fits your horse or mule perfectly.
Finishing and Adjusting Your Collar
Now that you have assembled your mule tape breast collar, it's time to add some finishing touches and make any necessary adjustments to ensure a proper fit for your horse or mule. This section will guide you through the final steps of the project.
1. Adding Decorative Elements
If you want to enhance the appearance of your breast collar, you can consider adding decorative elements. This is an optional step but can add a personal touch and make your collar stand out. Some options include attaching conchos, beads, or leather accents to the breast collar. You can find these decorative elements at craft stores or online equestrian supply shops. Be creative and choose elements that reflect your style and preference.
2. Adjusting the Collar to Fit Your Horse or Mule
To ensure a comfortable fit, it's important to adjust the breast collar to your horse or mule's measurements. Here's how you can do it:
- Place the breast collar onto your horse or mule, with the chest strap positioned across the chest and the shoulder straps going over the shoulders.
- Check that the breast collar sits snugly but not too tightly against the chest. You should be able to fit two fingers between the breast collar and your horse or mule's chest.
- Make sure the shoulder straps are not pulling too tight or hanging too loose. They should allow for natural movement without restricting your horse or mule's shoulder rotation.
- Adjust the length of the shoulder straps by moving the buckles on the chest strap. Slide them to shorten or lengthen the straps until they fit comfortably.
- Once you have achieved the desired fit, secure the buckles in place by folding the ends of the shoulder straps over and sewing them securely.
Remember to regularly check and adjust the fit of your mule tape breast collar as your horse or mule's body shape may change over time due to growth or conditioning.
By adding decorative elements and adjusting the collar to fit your horse or mule properly, you have completed the final steps of the project. Your mule tape breast collar is now ready to be used and enjoyed!

